
1. 概要
先日、テキスト形式のログファイルの抜粋を記載した数百枚の Excel シートを用意する必要があり、C# でテキストファイルを読み取り、その一部を Excel シートに記載するプログラムを作成しました。
所定の形式の Excel シートのコピーを作成し、いくつかのセルにログファイルから読み取った文字列を入力するプログラムになります。
プログラムは C# で Excel ファイルを操作できる NPOI 2.7.1 を使用して作成しました。
このとき作成したプログラムを少し修正し、下記のリンク先にアップロードしました。
https://github.com/fukagai-takuya/wpf-handle-excel
以前、Prism を使用して MVVM のプログラムを作成していましたが、その内部の処理の確認のため、今回は Prism を使用しないで文字列とコマンドのデータバインディングを実装しました。
Material Design In XAML Toolkit と Prism を組み合わせて使用するには注意が必要なため、それを避けたかったことも今回 Prism を使用しなかった理由の一つです。
2. 用意したプログラムの内容
用意したプログラムの内容を以下に記します。
2.1. Visual Studio 2022 でソリューションを開く
ダウンロードしたプログラムの下記のファイルを Visual Studio 2022 で開きます。
./HandlingExcelWithWpf/HandlingExcelWithWpf.sln
2.2. ビルドして起動
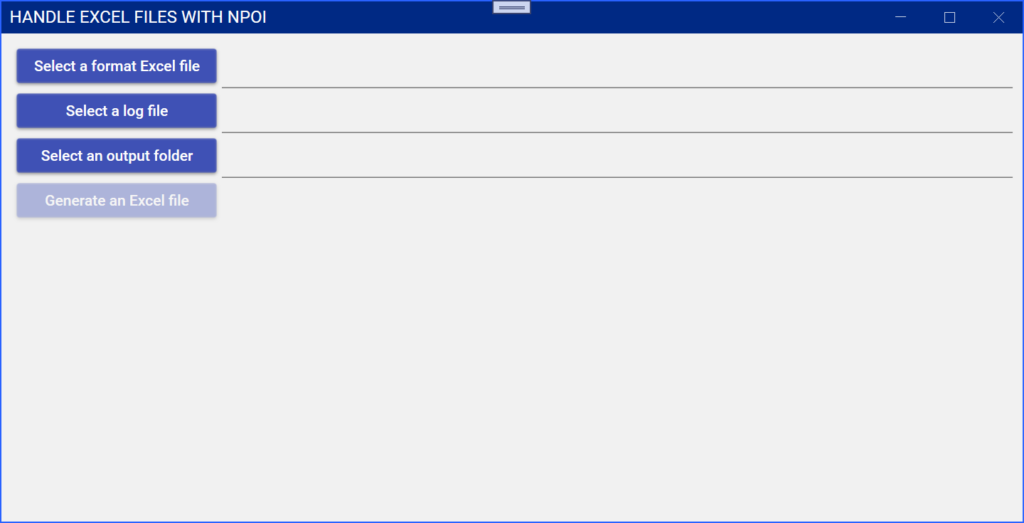
Debug ビルドして Debug 実行すると下の画像のような画面が表示されます。
2.3. サンプルファイルを選択して実行
Select a format Excel file ボタンをクリックし、下記の Excel ファイルを選択します。
./HandlingExcelWithWpf/HandlingExcelWithWpf/SampleFiles/SampleExcelFile.xlsx
このファイルは下の画像のような 1枚のシート SampleSheet を持つ Excel ファイルです。

Select a log file ボタンをクリックし、下記のテキストファイルを選択します。
./HandlingExcelWithWpf/HandlingExcelWithWpf/SampleFiles/SampleTextFile.txt
このファイルは下記の内容のテキストファイルです。
2024/09/01
push-up:75
sit-up:60
chin-up:30
note:Same as usual

2024/09/02
push-up:75
sit-up:60
chin-up:30
note:Same as usual

2024/09/03
push-up:80
sit-up:70
chin-up:30
note:Good condition

2024/09/04
push-up:75
sit-up:60
chin-up:26
note:Same as usual

2024/09/05
push-up:75
sit-up:60
chin-up:30
note:Same as usual
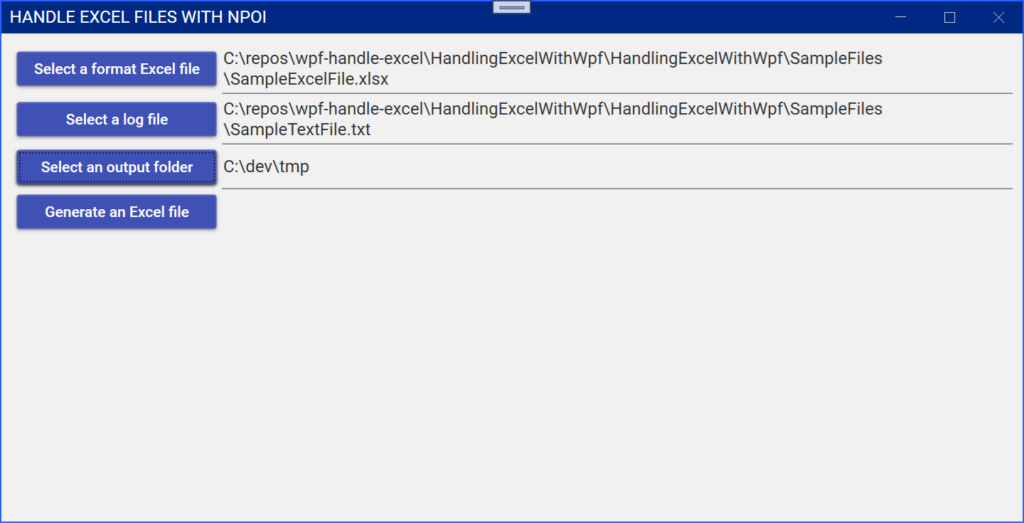
Select an output folder ボタンをクリックし、作成される Excel ファイルの保存先ディレクトリを選択します。
ファイルとディレクトリの選択後、下の画像のように Generate an Excel file ボタンが有効になります。
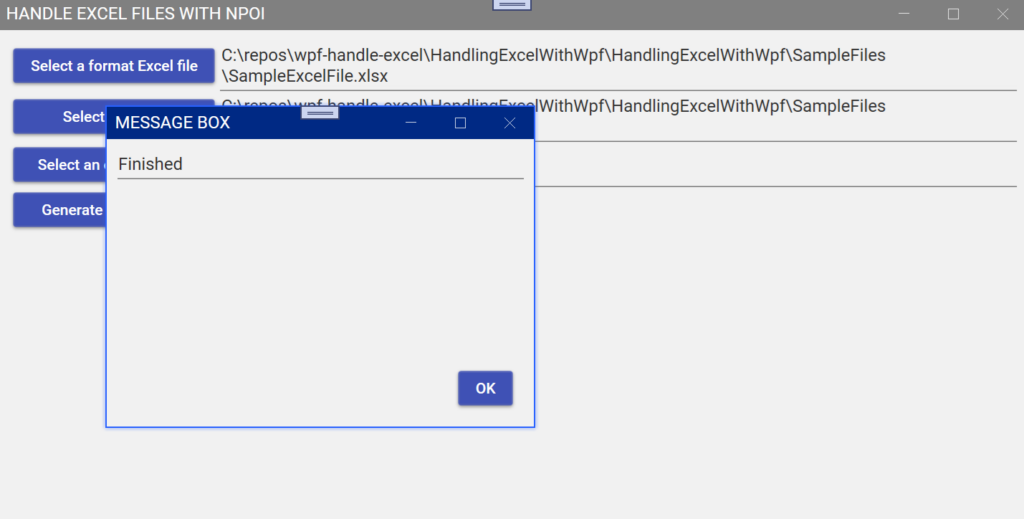
Generate an Excel file ボタンをクリックし、Excel ファイルを作成します。Excel ファイルが作成されたら、下の画像のようなメッセージボックスが表示されます。
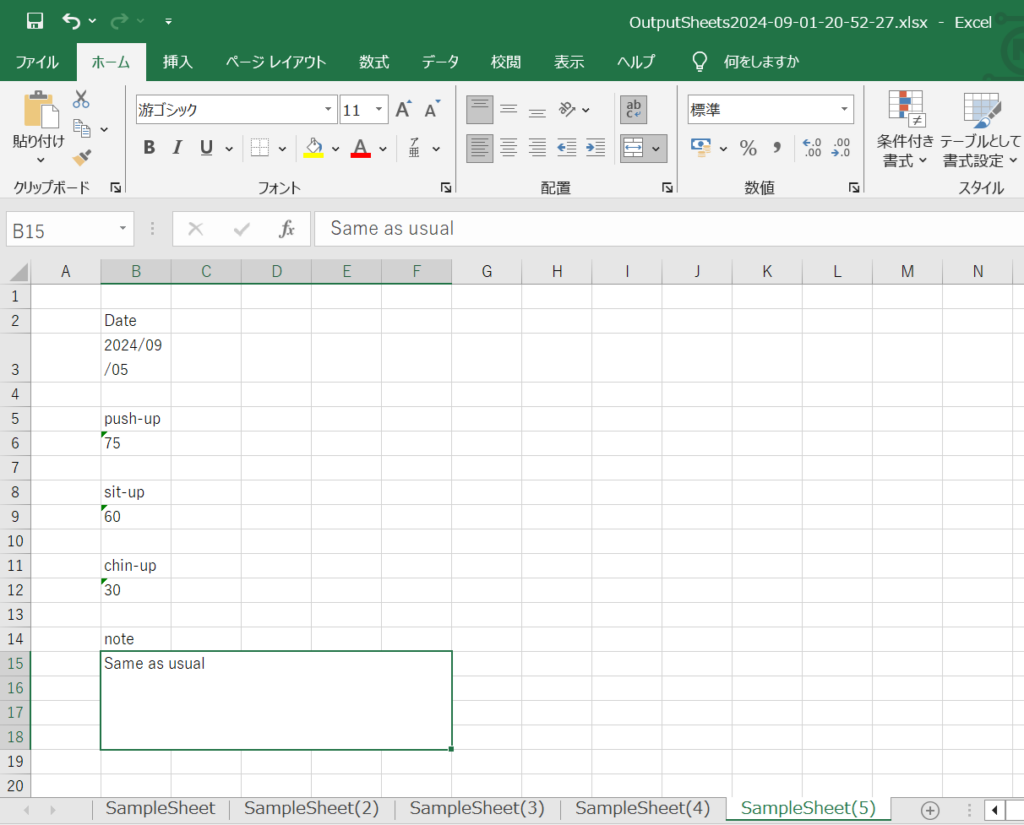
保存先フォルダに下記のような名前の Excel ファイルが作成されます。
/c/dev/tmp/OutputSheets2024-09-01-20-52-27.xlsx
ファイルを開くとテキストファイルから読み取られた内容が入力された Excel ファイルとなっていることを確認できます。5枚のシートからなる Excel ファイルです。
3. 実装内容
3.1. NPOI 2.7.1 によるファイル操作
Generate an Excel file ボタンをクリックしたときに実行される GenerateExcelFileCommand の下記のメソッドで NPOI 2.7.1 のメソッドが呼ばれています。
メソッド OutputExcelFile() は Select a format Excel file ボタンをクリックして選択された Excel ファイルを元に Excel Book のインスタンスを作成しています。作成した Excel Book のインスタンスに対し、Sheet へのデータの書き込みと Sheet の複製を繰り返し実行しています。最後に Excel Book のインスタンスの内容を新しい Excel ファイルとして書き出しています。
メソッド WriteLogToSheet(ISheet sheet, List<string> logLines) では、テキストファイルから読み取られた内容を Excel Sheet のセルに出力しています。
    private void OutputExcelFile()
    {
        // Read Excel book
        IWorkbook book = WorkbookFactory.Create(_MainWindowViewModel.SelectedFormatFileName);

        // Get Excel sheet with sheet name
        ISheet sheet = book.GetSheet(_SheetName);

        int sheetNum = 1;

        StreamReader sr = new StreamReader(_MainWindowViewModel.SelectedLogFileName);

        var logLines = new List<string>();

        while (true)
        {
            // Read the next line
            var line = sr.ReadLine();

            if (line == null || line.Trim().Length == 0)
            {
                if (sheetNum > 1)
                {
                    // Prepare a new Excel sheet by copying a current sheet
                    sheet = sheet.CopySheet($"{_SheetName}({sheetNum})");
                }

                WriteLogToSheet(sheet, logLines);
                sheetNum++;

                if (line == null)
                {
                    break;
                }
            }
            else
            {
                logLines.Add(line);
            }
        }

        // close the file
        sr.Close();

        DateTime dateTime = DateTime.Now;
        string dateTimeStr = dateTime.ToString("yyyy-MM-dd-HH-mm-ss");
        string outputFileName = $"{_MainWindowViewModel.SelectedOutputDirName}\\OutputSheets{dateTimeStr}.xlsx";

        using(var fs = new FileStream(outputFileName, FileMode.Create))
        {
            book.Write(fs);
        }

        MessageWindow.Show("Finished");
    }

    private void WriteCell(ISheet sheet, int rowIndex, int columnIndex, string outputString)
    {
        var row = sheet.GetRow(rowIndex) ?? sheet.CreateRow(rowIndex);
        var cell = row.GetCell(columnIndex) ?? row.CreateCell(columnIndex);
        cell.CellStyle.WrapText = true;
        cell.SetCellValue(outputString);
    }

    private Regex _RegDate = new Regex(@"(\d{4}/\d{2}/\d{2})");
    private Regex _RegItem = new Regex(@"([-a-z]+):(.+)");

    private void WriteLogToSheet(ISheet sheet, List<string> logLines)
    {
        foreach (var line in logLines)
        {
            var match = _RegDate.Match(line);
            if (match.Success)
            {
                var dateStr = match.Groups[1].Value.Trim();
                WriteCell(sheet, 2, 1, dateStr);
                continue;
            }

            match = _RegItem.Match(line);
            if (match.Success)
            {
                var keyStr = match.Groups[1].Value.Trim();
                var valueStr = match.Groups[2].Value.Trim();

                if (keyStr == "push-up")
                {
                    WriteCell(sheet, 5, 1, valueStr);
                }
                else if (keyStr == "sit-up")
                {
                    WriteCell(sheet, 8, 1, valueStr);
                }
                else if (keyStr == "chin-up")
                {
                    WriteCell(sheet, 11, 1, valueStr);
                }
                else if (keyStr == "note")
                {
                    WriteCell(sheet, 14, 1, valueStr);
                }
            }
        }

        logLines.Clear();
    }
3.2. データバインドされた文字列の表示の更新
Prism は使用しないで、MainWindow.xaml の下記の TextBox のように Text にバインドされた文字列を更新するようにしました。
            <TextBox Grid.Row="0" Grid.Column="1" IsReadOnly="True"
                     TextWrapping="Wrap" Text="{Binding SelectedFormatFileName, Mode=OneWay}" />
MainWindow.xaml.cs の下記の MainWindow のコンストラクタで DataContext に MainWindowViewModel のインスタンスをセットしています。
public partial class MainWindow : MetroWindow
{
    public MainWindow()
    {
        InitializeComponent();
        this.DataContext = new MainWindowViewModel();
    }
}
MainWindowViewModel.cs では、下記のコードのようにプロパティ SelectedFormatFileName に値がセットされたときに NotifyPropertyChanged(nameof(SelectedFormatFileName)); を実行してプロパティ SelectedFormatFileName の変更を通知するようにしています。こうすることでプロパティ SelectedFormatFileName に文字列がセットされたら、MainWindow に表示される文字列が更新されます。
this.GenerateExcelFile.NotifyCanExecuteChanged(); は Generate an Excel file ボタンの有効・無効を更新するメソッドです。
public class MainWindowViewModel : INotifyPropertyChanged
{
    public event PropertyChangedEventHandler? PropertyChanged;
    private void NotifyPropertyChanged([CallerMemberName] String propertyName = "")
    {
        if (PropertyChanged != null)
        {
            PropertyChanged(this, new PropertyChangedEventArgs(propertyName));
        }
    }

    ...

    private string m_SelectedFormatFileName = "";
    public string SelectedFormatFileName
    {
        get => m_SelectedFormatFileName;
        set
        {
            m_SelectedFormatFileName = value;
            NotifyPropertyChanged(nameof(SelectedFormatFileName));
            this.GenerateExcelFile.NotifyCanExecuteChanged();
        }
    }
3.3. コマンドのデータバインディング
MainWindow.xaml では、下記のコードの例のようにコマンドのデータバインディングも行っています。こちらも Prism を使用しないで実装しました。
            <Button Grid.Row="0" Grid.Column="0" Margin="5" Content="{Binding SelectFormatFileButtonName}" Command="{Binding SelectFormatFile}" />
            ...
            <Button Grid.Row="3" Grid.Column="0" Margin="5" Content="{Binding GenerateExcelFileButtonName}" Command="{Binding GenerateExcelFile}" />
コマンドのデータバインディングは下記の MainWindowViewModel.cs のコードの例のように ICommand または IRelayCommand インターフェースを実装したクラスのインスタンスをセットして実装しています。
    public ICommand SelectFormatFile { get; }
    ...
    public IRelayCommand GenerateExcelFile { get; }

    public MainWindowViewModel()
    {
        this.SelectFormatFile = new SelectFormatFileCommand(this);
        ...
        this.GenerateExcelFile = new GenerateExcelFileCommand(this);
    }
SelectFormatFileCommand クラスは下記のようになっています。常に実行できるようにしているため、CanExecute(object? parameter) メソッドは true を返すようにしています。Select a format Excel file ボタンがクリックされたら、下記のコードの Execute(object? parameter) メソッドが呼ばれます。
public class SelectLogFileCommand : ICommand
{
    public event EventHandler? CanExecuteChanged;

    private MainWindowViewModel _MainWindowViewModel;

    public SelectLogFileCommand(MainWindowViewModel mainWindowViewModel)
    {
        _MainWindowViewModel = mainWindowViewModel;
    }

    public bool CanExecute(object? parameter)
    {
        return true;
    }

    public void Execute(object? parameter)
    {
        var dialog = new Microsoft.Win32.OpenFileDialog();
        dialog.DefaultExt = ".txt"; // Default file extension
        dialog.Filter = "State Inquiry Log File (.txt)|*.txt"; // Filter files by extension

        // Show open file dialog box
        bool? result = dialog.ShowDialog();

        // Process open file dialog box results
        if (result == true)
        {
            _MainWindowViewModel.SelectedLogFileName = dialog.FileName;
        }
    }
}
下記のコードは GenerateExcelFileCommand クラスのコードの一部です。IRelayCommand は ICommand インターフェースに NotifyCanExecuteChanged() メソッドが追加されたインターフェースです。IRelayCommand は Microsoft の NuGet パッケージ CommunityToolkit.Mvvm 8.3.0 に含まれています。
public class GenerateExcelFileCommand : IRelayCommand
{
    public event EventHandler? CanExecuteChanged;

    public void NotifyCanExecuteChanged()
    {
        CanExecuteChanged?.Invoke(this, EventArgs.Empty);
    }

    private MainWindowViewModel _MainWindowViewModel;

    private const string _SheetName = "SampleSheet";

    public GenerateExcelFileCommand(MainWindowViewModel mainWindowViewModel)
    {
        _MainWindowViewModel = mainWindowViewModel;
    }

    public bool CanExecute(object? parameter)
    {
        if (_MainWindowViewModel.SelectedFormatFileName != "" &&
            _MainWindowViewModel.SelectedLogFileName != "" &&
            _MainWindowViewModel.SelectedOutputDirName != "")
        {
            return true;
        }
        else
        {
            return false;
        }
    }

    public void Execute(object? parameter)
    {
        OutputExcelFile();
    }
下記のコードの例のように、MainWindowViewModel クラスのプロパティ SelectedFormatFileName 等に新たな値がセットされたら、 this.GenerateExcelFile.NotifyCanExecuteChanged(); を呼んで Generate an Excel file ボタンの有効・無効を更新します。
public class MainWindowViewModel : INotifyPropertyChanged
{
    ...
    private string m_SelectedFormatFileName = "";
    public string SelectedFormatFileName
    {
        get => m_SelectedFormatFileName;
        set
        {
            m_SelectedFormatFileName = value;
            NotifyPropertyChanged(nameof(SelectedFormatFileName));
            this.GenerateExcelFile.NotifyCanExecuteChanged();
        }
    }